Family owned and operated since 1999
11154 W Grand River Rd
Fowlerville, MI 48836
517-223-9670
CURRENT HOURS
Monday 8 am - 6 pm
Tuesday 8 am - 6 pm
Wednesday 8 am - 6 pm
Thursday 8 am - 6 pm
Friday 8 am - 4 pm
Sat & Sun Closed
W*** NOTICE ***
CHECK HERE BEFORE BRINGING YOUR TRAILER IN FOR IMPORTANT UP TO DATE INFORMATION
WE WILL BE CLOSED FRIDAY JULY 3rd FOR THE HOLIDAY.
Current repair times are running 1 - 2 weeks depending on type of repair and parts availability.
If you need your trailer back sooner, we will do our best to accommodate you. Please inform us at drop off, or make an appointment. Thank you for your patience and understanding.
There are many places to get your camper or trailer worked on. Some places are cheaper than us, some are more expensive. But none of them are better, and here's why. We actually care about our work. We do it right, or we don't do it. It takes longer to do it right. Many places, especially dealerships, only care about "get it in, get it done, get it out." A repair to us isn't something to be rushed out so we can get to the next job and cash a check. Each repair is given the time and effort it deserves. Here are some pictures and examples of what makes us better.

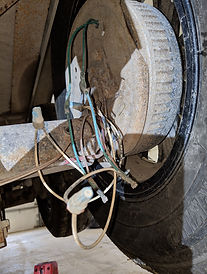
This is what a wheel bearing looks like when it comes out of your drum. Some places will just pack fresh grease into it and put it back in. Bearings wear out, rust and go bad. They need to be inspected, to do this they need to be cleaned. We clean every single bearing for inspection and replace them if necessary.
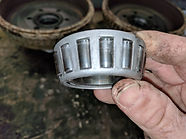
This is what a bearing looks like after it has been cleaned. Notice the heavy wear on the rollers. This needs to be replaced. We could not have seen this damage without properly cleaning the bearing first. Any time a wheel bearing is replaced the race in the drum MUST be replaced as well. We will never mix new bearings in worn races.
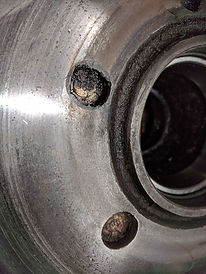
This drum was overgreased by using the zerk fitting in the axle. Grease has leaked past the seal and on to the drum. When grease gets into the stud holes it will continue to ooze out and coat the magnet. This prevents the brakes from engaging. Most places would leave this. Some might wipe out the drum but not clean out the holes.
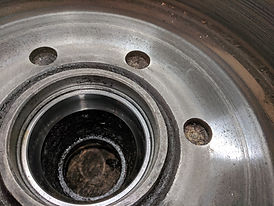
This is what a drum looks like after we clean it. All the old grease is removed from inside and the races are inspected. Any grease that leaked onto the magnet surface or brake surface is completely removed (brakes don't work when covered in grease). Notice the holes from the wheel studs have been cleaned out as well.

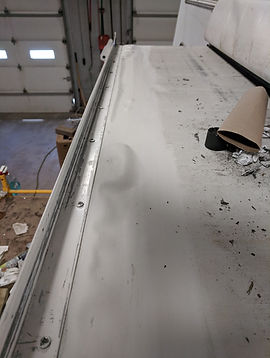
LEFT: this is the factory seam tape on a slideout roof. We don't like to use this tape often, usually there are better options. But some times it is the best tool for the situation. Many people will use this because it seems simple, just peel and stick. No, no, no. As with anything, prep work is key. Nobody likes to spend an hour or two (sometimes more) scrubbing, and rubbing and cleaning, it sucks. It's tedious and makes your hands and fingers hurt, but it's necessary. If the surface is not clean nothing will stick. This is true for any type of sealant work.
RIGHT: this is what the molding looks like after it has been properly cleaned. We always properly clean anything that needs to be caulked or sealed. Now the new tape can go on. (Most places will simply go right over the old stuff). The tape is pressure activated and needs to be pressed in with a roller. Another step most places skip. Not us.
This is what happens to the roof wood when the glued down rubber is removed. Many of the strands are ripped off. There is also a lot of glue residue left on the roof. Many places will glue the new rubber directly to this material. We never do. This leaves the roof with a lot of shallow spots where water will pool, and also is much more likely to bubble when being installed or afterwards. When we replace the rubber on an existing roof we always overlay the entire roof with new luan to provide a clean smooth surface.

This is a complete new roof so there was no need to overlay. This is all new osb. We also use a quality seam tape over all the seams and edges that protects the rubber but allows the glue to penetrate. Most places use duct tape or nothing at all. Furthermore, you'll notice all of our plywood, boards and roof edges are screwed down. Most places use staples which do not hold nearly as well and often break or wiggle loose. All of our processes take longer, but are far superior.

This is what wet, rotted wood looks like under the rubber roof. I spoke with a repair tech from a large Michigan dealership. He said they are allowed 3 to 4 days to have a trailer in a bay when replacing a roof. It has to be done in that time. No exceptions. It takes us 2 to 4 weeks to do a roof replacement. Once the wet wood and rotted materials are all removed, it is important to make sure everything else is completely dry. We let the trailers sit for hours to days with high volume fans on them to make sure any moisture inside the walls, roof etc is completely dry. Then we thoroughly inspect everything to tell what wood needs to be replaced and what is savable. Leaving any wet wood covered up will lead to continued rotting and mold growth. This takes time, but is well worth it.


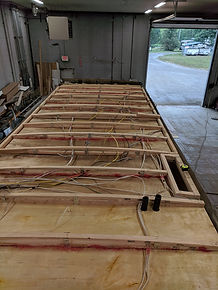
This is a complete new roof. Notice all the wiring that runs through a roof (left picture). It is a mix of coax, speaker, DC and AC wires. We are able to make our own rafters (right). This allows us to build the roof around the existing wiring and duct work without having to cut or splice anything.
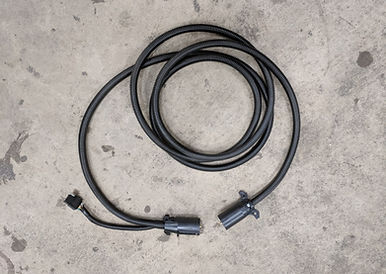
When we install wiring on a vehicle we run it inside of wire loom to protect it (and it looks much nicer). We only use water tight electrical connections on anything that will be exposed to the elements. They cost a little more, and take a little longer to install, but they are the best. Most places use "scotch locks" because they are quick and easy. These cut the wire insulation and leave them exposed to corrosion. They will work for a while but will be destroyed by road salt. We never have and never will use these connections on exterior wires. We do not poke wires with a test light. This leaves little holes in the insulation that will quickly corrode and rot after just one Michigan winter. We use nylon connections instead of vinyl. We use only high quality 3M Super 33+ electrical tape. We use screws instead of staples in wood. We always mount our hitch plugs to brackets, most cars I see have the 4-flat plugs just zip tied or wrapped around the hitch and are left dangling. We would never do that. We put dielectric grease in our plugs to protect them. We secure all loose wires out of the way. We spray exposed posts on circuit breakers, batteries and grounds with anti-corrosion spray. There are a lot of little things we do that the average person would never notice...and that's the point. When it is done right it should look factory. When it's done here it is usually better than factory.
If we work on your camper and notice the door is closing hard, or the key is stiff, we will lube it for you. No charge, we don't even tell you it was done, we just do it. If we replace your awning canvas, we also lube the rafter nobs and arms, because it makes it work better and last longer. Again, it's a lot of little things you probably would never notice, but we do it anyway.

THEIRS
OURS

Things you will NEVER see done here:

This bracket should have 2 bolts in it. And the truck should NOT have a large chunck cut out of it with a blow torch! Ever!

This bolt should have a large washer on it

This roof was not cleaned before sealant was applied

Somebody poked this wire with a test light
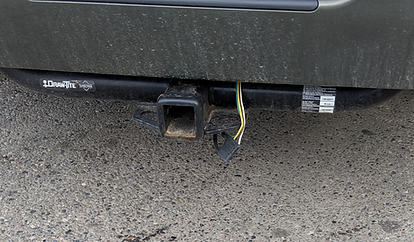
We always attach our plugs to brackets and secure them to the vehicle

Again, these should always have 2 bolts

There was no sealant behind these awning bolts
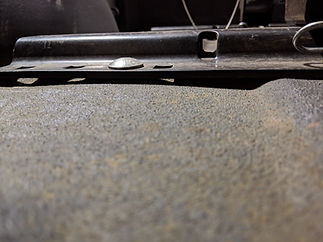
A spacer should have been installed between this rail and the truck bed, this is crushing the bed ribs
When I get more time I will upload more THEIRS / OURS pictures side by side. Or you can stop by our shop anytime and see them in person. We have lots of our repair pictures (and other places "repair" pictures) on hand that we love showing off. There are also a few on our pictures page